
In case you need WordPress site for testing or small website to start with, forget about hosting fees and providers terms, down size is lack of support, we are here for any question.
Of course there is some costs as we all know nothing is really free, but they are minimal like Domain Name - cost $12 a year, IP Address around $3.6 a month.
All that can be done with Amazon Web Services - T2 service.
Step by Step:
From AWS go to: Amazon Market Place https://aws.amazon.com/marketplace
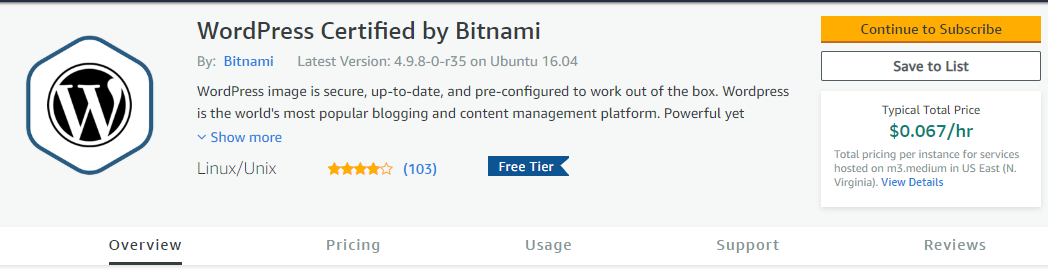
Search for: WordPress Certified by Bitnami https://aws.amazon.com/marketplace/pp/B00NN8Y43U
Once you find WordPress Certificated by Bitnami Click:
- Continue to Subscribe. Image 1.
- Continue to Configuration. Image 2.
- Change your location if you like, N. Virginia the cheapest, Ohio is the quiet neighborhood, N. California is expensive (local taxes) and stay away from Sap Paolo, click Continue to Lunch. Image 3.
- EC2 Instance Type: Change EC2 Instance Type -> T2.micro (this is free tier server). Image 4.
- Security Group Settings: Create New Based On Seller Settings -> Change SSH to your IP only. Image 5.
- Key Pair Settings: Create New Key Pair - Click - Create a key pair in EC2 -> Create Key Pair -> Name your Key Pair -> click create -> it will automatically download KeyPairName.pem -> Go back to configuration click the refresh to see your new Key Pair, choose it.
- Click lunch: Lunch trough EC2
Convert your .PEM to PKK:
Till AWS finish setup, open Putty Key Gen -> PuTTYgen (download and install if you don't have it)
Load the keypair.pem you downloaded (change file type to see all files) -> click OK on Successfully import notice -> Click Save Private Key -> Click OK on password warning.
Save your PKK! file you need it to login to server with PuTTY and WinSCP.
Assign Static IP instance:
Go back to your AWS Console , go to EC2 -> on the left panel click Elastic IP -> Allocate New Address -> Allocate -> Save the IP Click close.
Click on your new IP, on top click Action -> Associate Address - > Choose your Instance And Private IP -> click Associate -> Click Close.
Step by Step - After AWS finish setup.
Go back to Instances EC2 page, click your Instance you can see Instance info below, make sure you see your Elastic IP.
once your Instance marked click Actions -> Instance Settings -> Get Instance Log -> Scroll down (should be all almost @ bottom of log)
till you find your WP admin user name (user) and password should look like:
##################################################
# #
# Setting Bitnami application password to 'YOUR-PASSWORD' #
# (the default application username is 'user') #
# #
# ################################################
Save your password, its the only time you can see it, once gone the only way to login is change Admin Password via PHPmySQL! close the window.
open new browser: goto your elastic IP you should see WordPress page. login to Dashboars goto: http://yourip/wp-admin user: user. use the password you got from the log.
Add plugins needed and content.
PuTTY:
- Open Putty: Fill fields.
- Host Name: bitnami@elasticIP.
- port: 22
- Connection Type: SSH
- Security: Click on + next to SSH on the left panel. Click Auth -> browse to your PKK file (the file you generated before).
- Save it for next time, click open.
- first time you should get key worning click OK.
WinSCP
- Open WinSCP:
- In Login Screen Click: New site -> SFTP.
- Host Name: Instance elasticIP.
- User name: bitnami.
- PKK: Click advanced -> SSH -> Authentication -> Private Key file -> browse to your PKK file (the file you generated before) ->OK
- Save it for next login
Change Domain Name:
Make sure you point your domain name to new elastic IP you assigned to Instance!!!
Login with WinSCP to your Instance go to:
/opt/bitnami/apps/wordpress/htdocs/wp-config.php
Edit this file and replace this lines:
define('WP_SITEURL', 'http://' . $_SERVER['HTTP_HOST'] . '/');
define('WP_HOME', 'http://' . $_SERVER['HTTP_HOST'] . '/');
with the lines below, remembering to replace the DOMAIN placeholder with the actual domain name you wish to use:
define('WP_SITEURL', 'https://DOMAIN/');
define('WP_HOME', 'https://DOMAIN/');
Setup your Free SSL LetsEncrypte with LEGO client:
Login to your Instance with PuTTY
Setup LEGO client, it will create and renew your SSL certificate.
- cd /tmp
- curl -s https://api.github.com/repos/xenolf/lego/releases/latest | grep browser_download_url | grep linux_amd64 | cut -d '"' -f 4 | wget -i -
- tar xf lego_vX.Y.Z_linux_amd64.tar.gz (file name need to be match to file downloaded previous step)
- sudo mv lego /usr/local/bin/lego
Turn Off Services:
sudo /opt/bitnami/ctlscript.sh stop
Setup SSL:
sudo lego --email="EMAIL-ADDRESS" --domains="DOMAIN" --domains="www.DOMAIN" --path="/etc/lego" run
(replace the DOMAIN placeholder with the actual domain name)
set server to use new cert:
- sudo mv /opt/bitnami/apache2/conf/server.crt /opt/bitnami/apache2/conf/server.crt.old
- sudo mv /opt/bitnami/apache2/conf/server.key /opt/bitnami/apache2/conf/server.key.old
- sudo mv /opt/bitnami/apache2/conf/server.csr /opt/bitnami/apache2/conf/server.csr.old
- sudo ln -s /etc/lego/certificates/DOMAIN.key /opt/bitnami/apache2/conf/server.key
- sudo ln -s /etc/lego/certificates/DOMAIN.crt /opt/bitnami/apache2/conf/server.crt
- sudo chown root:root /opt/bitnami/apache2/conf/server*
- sudo chmod 600 /opt/bitnami/apache2/conf/server*
(replace the DOMAIN placeholder with the actual domain name)
Redirect Traffic from HTTP & HTTP://WWW to HTTPS://
Edit httpd-app.conf - Bitnami & AWS is protracted setup, instead of editing .htaccess you need to update httpd-app.conf file.
/opt/bitnami/apps/wordpress/htdocs/httpd-vhosts.conf
Add this code below, in VirtualHost settings:
IT WILL REDIRECT ALL TRAFFIC TO HTTPS://DOMAIN.COM
<VirtualHost *:80>
ServerName domain.com
ServerAlias www.domain.com
RewriteEngine On
RewriteCond %{HTTP_HOST} ^www\.(.*)$ [NC]
RewriteRule ^(.*)$ https://%1$1 [R=permanent,L]
RewriteCond %{HTTP:X-Forwarded-Proto} =http
RewriteRule .* https://%{HTTP:Host}%{REQUEST_URI} [L,R=permanent]
DocumentRoot "/opt/bitnami/apps/wordpress/htdocs"
Include "/opt/bitnami/apps/wordpress/conf/httpd-app.conf"
</VirtualHost>
start your server
sudo /opt/bitnami/ctlscript.sh start
Renew cert:
- sudo /opt/bitnami/ctlscript.sh stop
- sudo /opt/bitnami/letsencrypt/lego --tls --email="your@email.here" --domains="domian.com" --path="/opt/bitnami/letsencrypt" renew --days 90
- sudo /opt/bitnami/ctlscript.sh start


Hits: 212